Is there anything better than fresh breakfast scones filled with a thousand different flavor combinations? Yes! Just add a pipping hot cup of tea and someone to share it with and you will be in heaven. These scones are serious and they mean business. Delightfully simple to make and so damn rewarding. You may rethink the meaning of breakfast for these traditional recipe scones. This is a recipe taken from an old Scottish lass named Mrs. Macnab, made famous by King Frederick II whom made several delicious trips outside Balmoral castle to get these scones. This is her recipe, still unchanged from the 1700's.
Mrs. Macnab's Scones:
...
2 Cups AP Flour
1 Tsp. (each) Salt & Baking Soda
2 Tsp. Cream of Tartar
4.5 Tbsp. Butter (room temperature)
1 Egg (room temperature, slightly beaten)
.5 Cup Buttermilk
...
1. Combine all dry ingredients thoroughly.
2. Rub in the butter by hand, slowly with the thumb and first two fingers until you get a bowl of dry butter crumbs. The more you make these the better you can tell if more butter is needed, as it sometimes is.
3. Slowly combine the buttermilk and egg. If the mixture sticks to your hands while mixing just use a bit of AP flour, but not to much to avoid the scones from turning out dry.
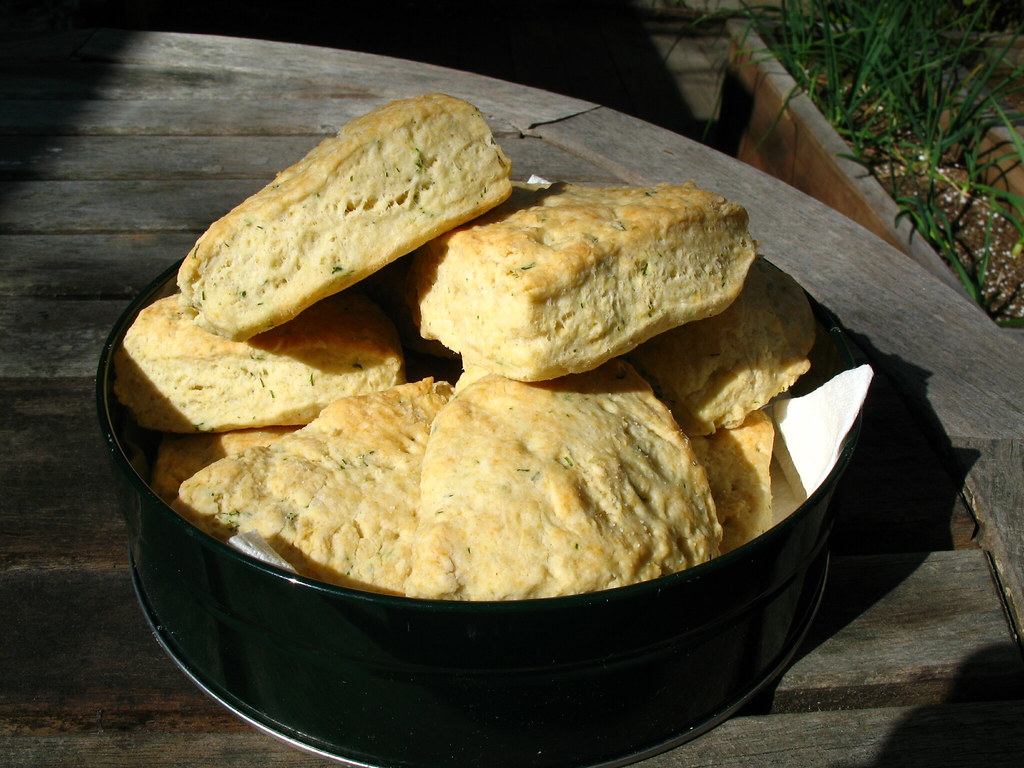
4. At this point add any flavors or aromatics to the dough, being careful to install the ingredients without forcing them into the dough (this would be considered a form of kneading, which you don't want to do). Some good choices for additions include sweet herbs (like dill or sage), fruit, cinnamon, maple syrup, chives, or shallots. You can really add anything to scones because their base flavor is so neutral. Another option is to make plain scones but you would want to up the sour factor of the buttermilk. Any ideas on how to do that? Let me know.
5. DO NOT KNEAD! Just bring the dough together well enough to be pliable.
6. Divide into shapes that you like. The traditional shape is a "round-edged" triangle which can be made by forming the dough into a circle and cutting out wedges.
7. Bake at 375 degrees for just 15 minutes. The scones should take a minimal amount of color and you can test them by taking one out of the oven and rapping it on the bottom. The sound should be firm and slightly hollow, not as extreme as a loaf of bread would be. My favorite way of testing is just to eat one, especially if you make several small scones because the potential waste of one scone wont be detrimental and hot scones are derlicious. There is also the probe thermometer method which I am a fan of and as always your probe should be placed in the center of your baked good and set to notify at just above 200 degrees F.
Let these rest on a wire rack for a few minutes to firm up the insides. You will know you were successful if the scone can be broken laterally into flakes of deliciousness.

3 comments:
I'm helluv making these on sunday...
Don't forget what I said about the butter. I think it could use almost another tablespoon than the recipe calls for. Maybe cut that extra tablespoon with a bit of buttermilk. I dunno, I'm making these again tomorrow to mess with the recipe.
Looking forward to trying your recipe- perhaps this weekend! Here is mine: Buttermilk Scones. Enjoy!
Post a Comment